In 2024 the Genoa furler drum and swivel were rebuilt with new seals, brearings and grease.
Sakura has a Profurl furling system for both the genoa (model NC42) and staysail (C350)
Both have seen many sea-miles, and the genoa furler was siezed.
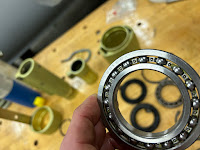
The unit uses carbon steel bearings which are prone to rust, the prevention of which relies on grease packing contained by sturdy lip seals. Preventative maintenance is impossible without disassembly, and over time, as seals age and wear, salt water eventually intrudes. (In this case, after 20 years of use.) Both drum and swivel assemblies from the NC42 were removed and brought home for examination and potential rebuild. Photo below is of the siezed, corroded bearing from the drum section, and the pristine 22-year-old bearing of the halyard swivel.

Rebuild kits are available for these units, and the work is not difficult for a reasonably-skilled amateur with appropriate tools. The kits consist of the correct grease, various circlips, bearings and seals. A vise is necessary and good workspace helpful. The drifts and fittings to press in the seals and bearings can be improvised. What cannot be improvised (I tried) are the large inside and outside circlip pliers that are required.


Components Required
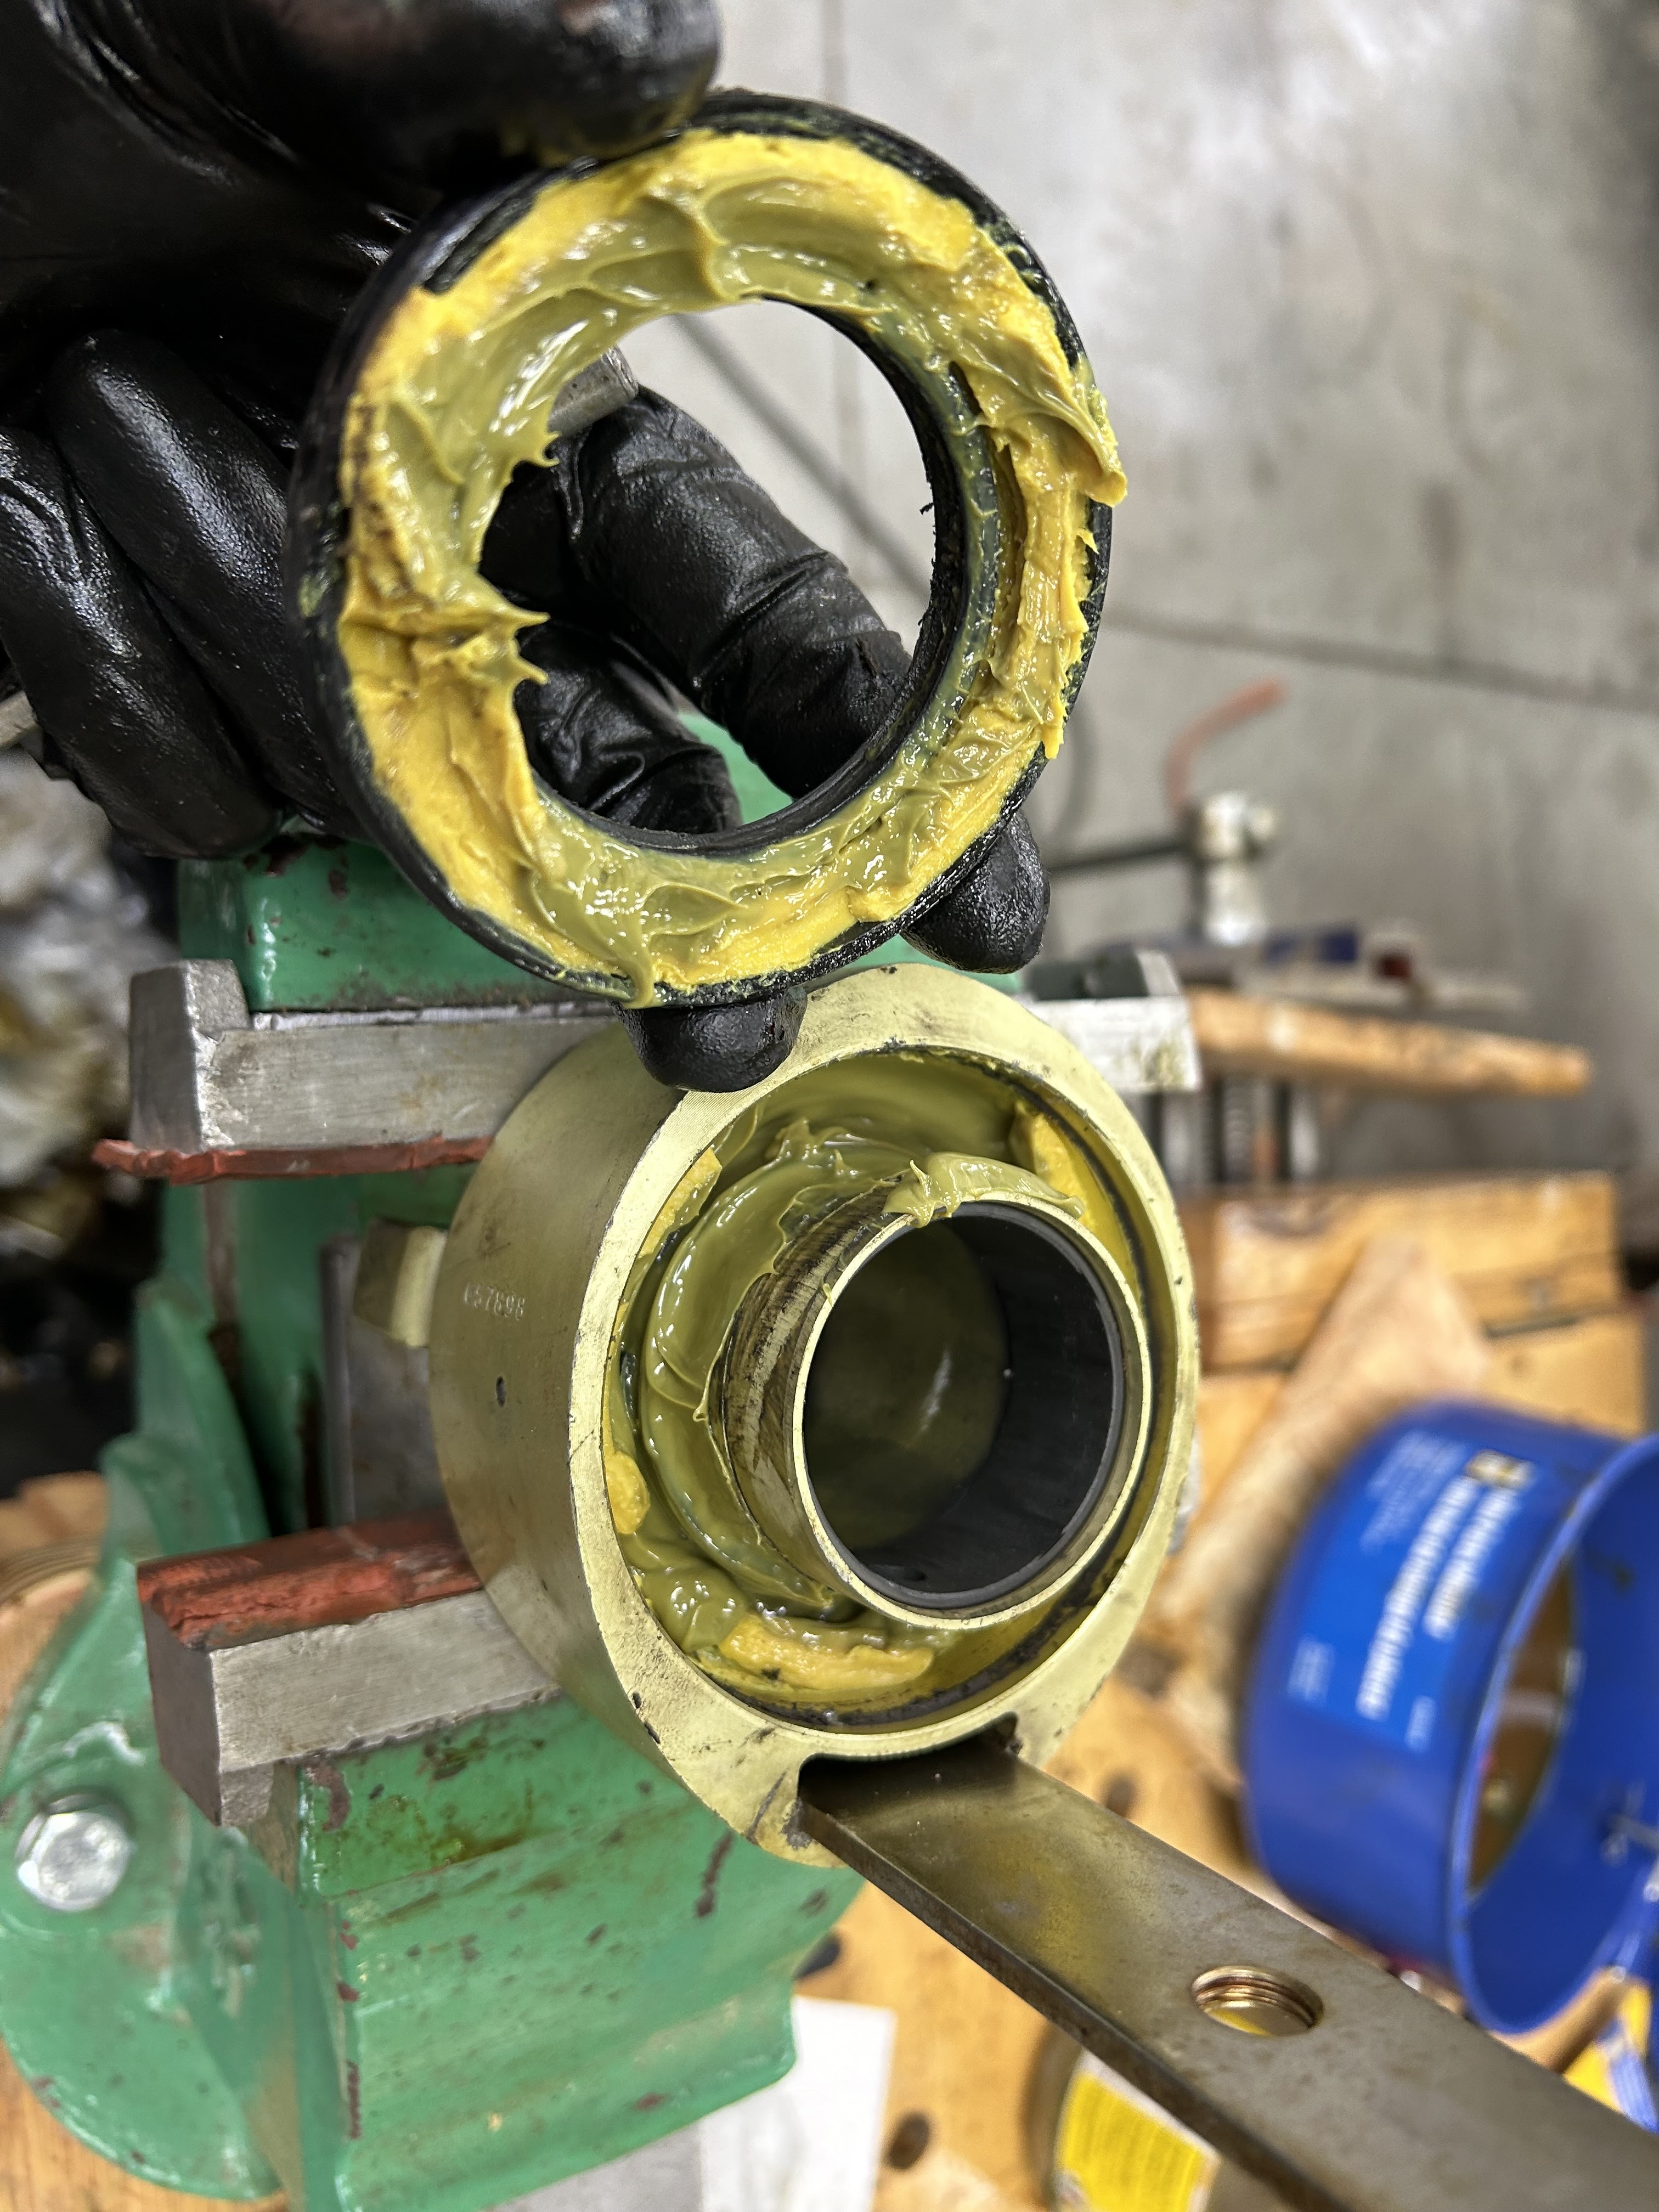
The seals have a dimension-based part mumber molded in. There are two grades of seal available, nitrile rubber and more costly FPE (fluoro-polymer elastomer?) The OEM seals are nitrile rubber units (black) and have mild steel seal-springs. They have stood up well. The more costly FPE seals are brownish in colour and supposedly have superior chemical and weather resistance.


Disassembly/Reassembly
First it is necessary to remove the drum and swivel from the extrusion. This process is fairly self-evident, but many owners struggle with siezed fasteners and end up with a much more involved job than hoped. I was fortunate in that mine came apart without incident, however it took some technique and patience. I used plenty of tefgel on reassembly.
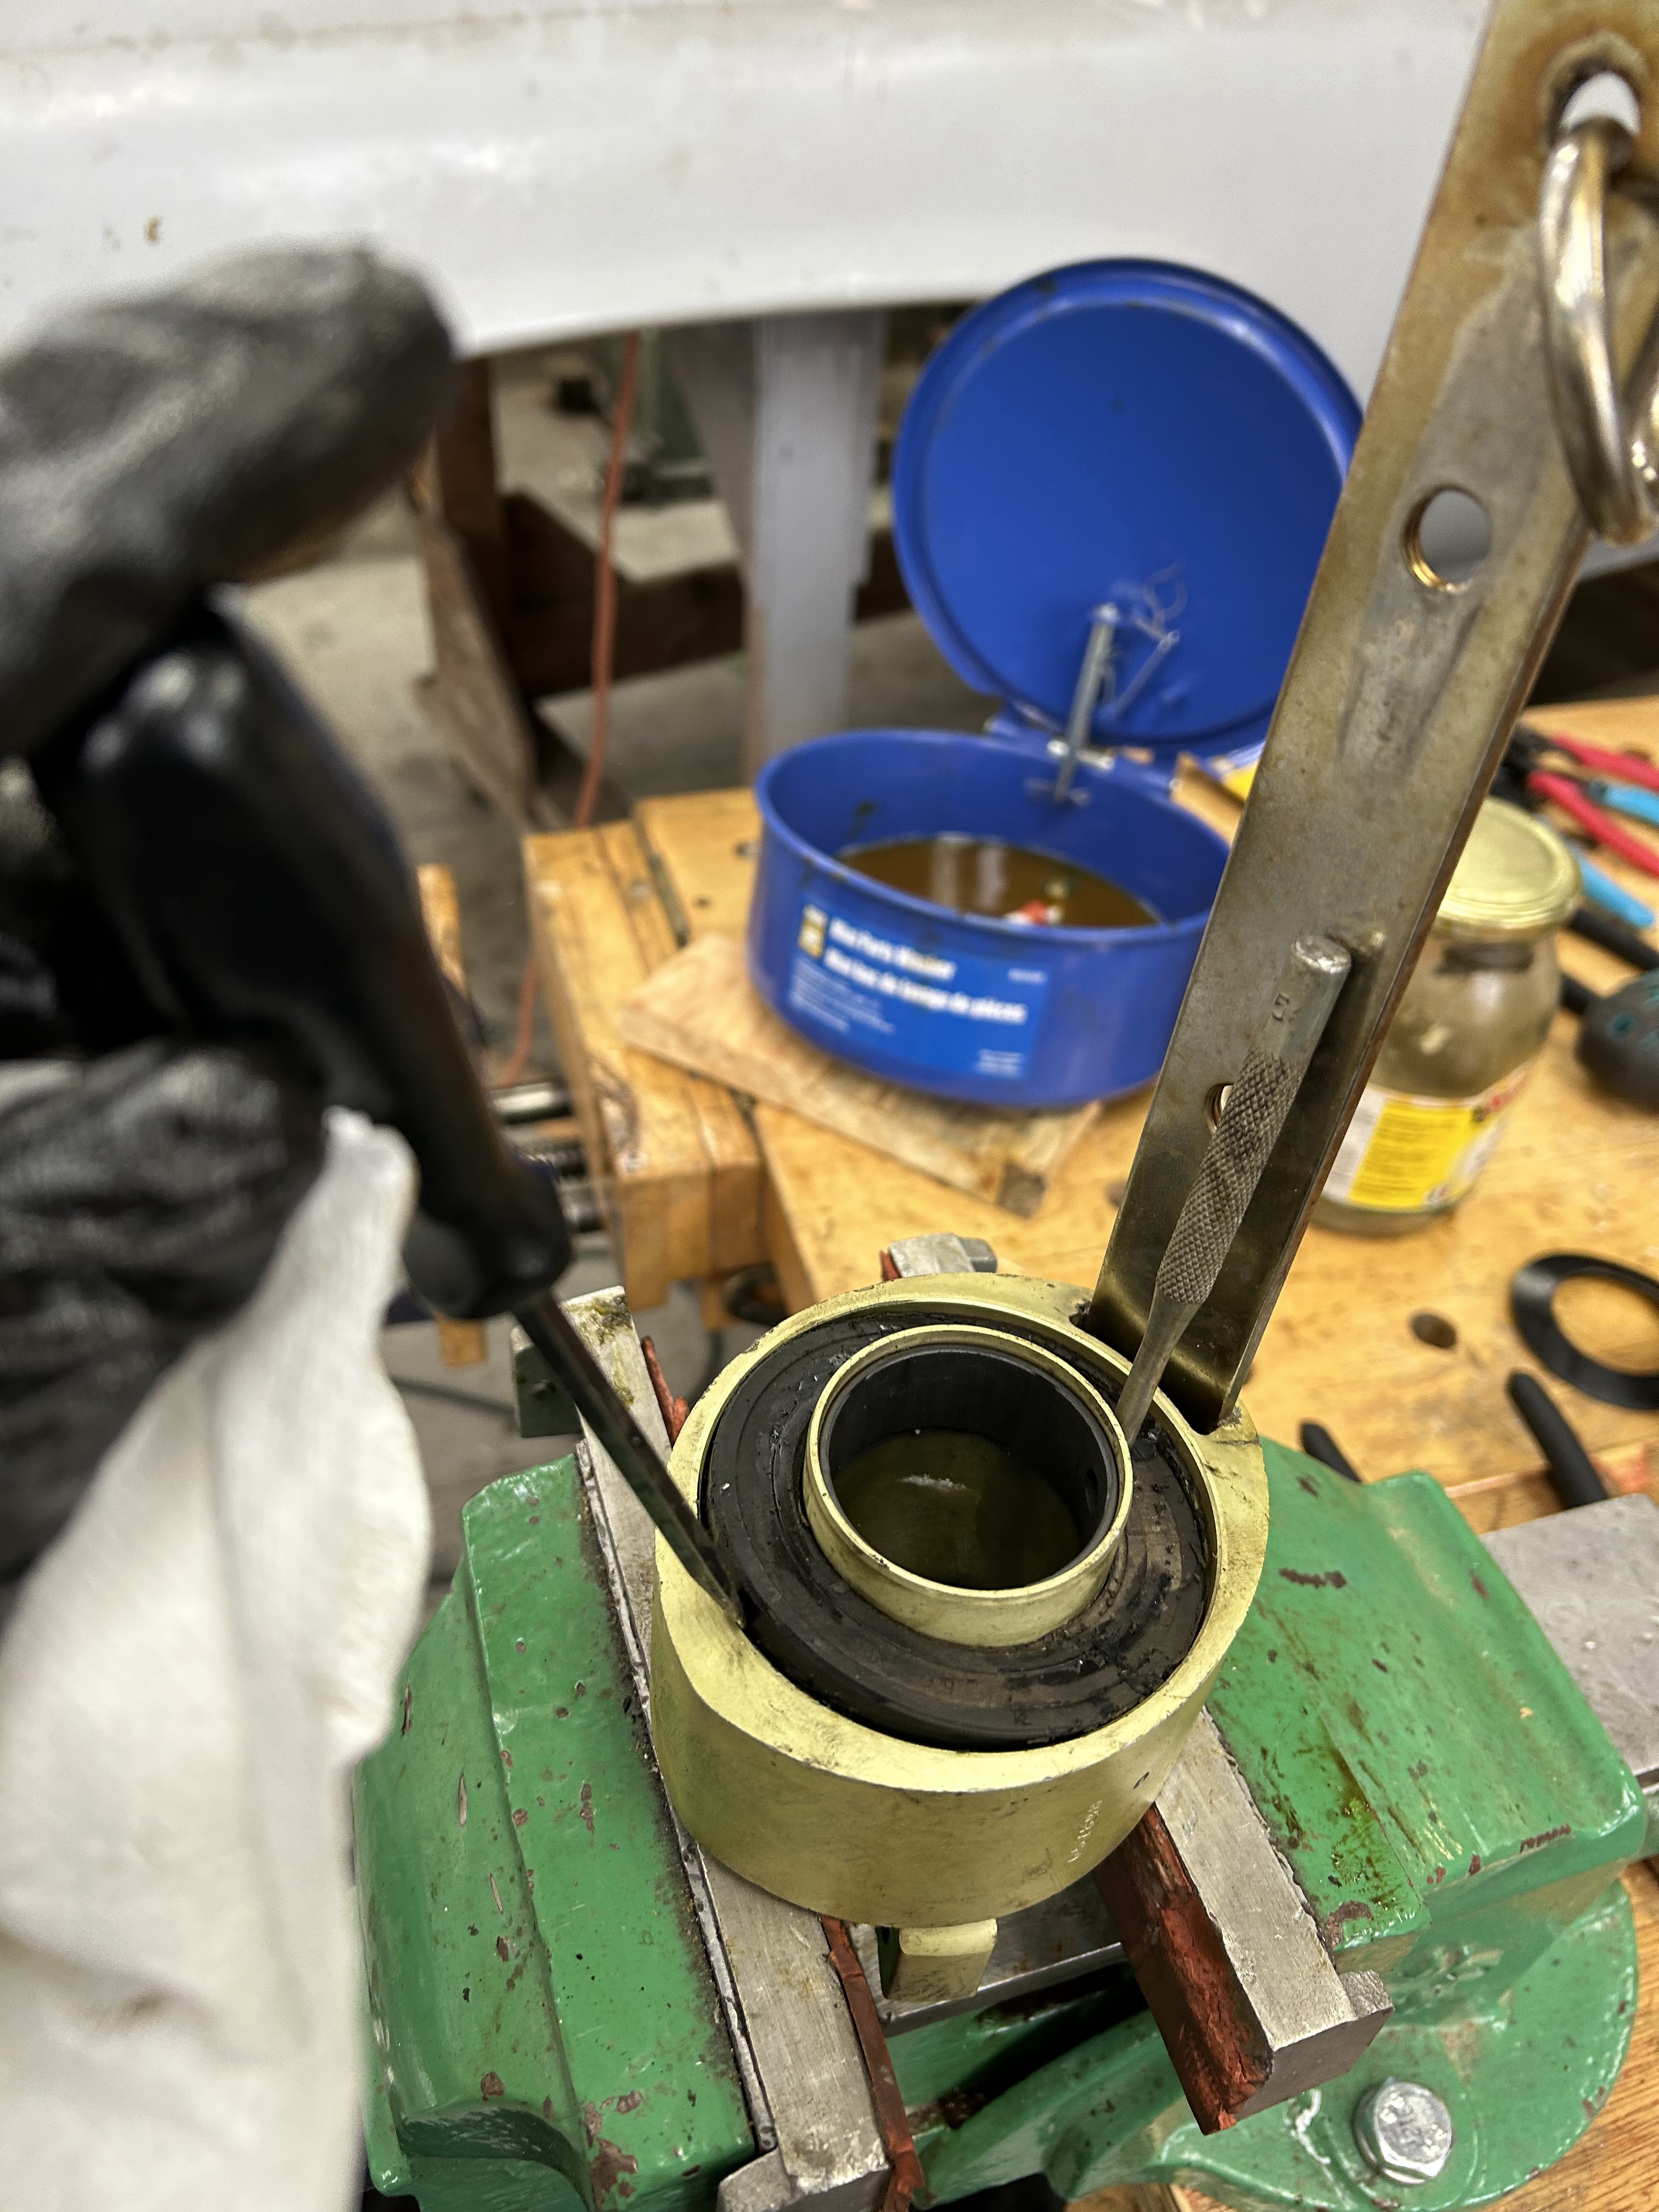
Once the swivel and drum housings are on the bench and secured, the first seal can be pried out, the grease scooped out until the first circlip is evident. This circlip is then removed, and so on with remaining bearing, spacers, and nore circlips. The sticky grease makes for messy work, so be prepared. The bearing may also be quite firmly seated and may require some confident persuasion with a mallet and drift to remove.
Whie it is a good idea to photograh and record the sequence of disassembly, the circlips vary in thickness and the machining in the housing corresponds to this, making it straightforward to visualize reassembly. The bearings may require some authority to remove and reinsert, so making wooden (or plastic pipe) dies to remove and reseat them is helpful. Also helpful for reassembly is heating the aluminum housing to expand it slightly. This makes it easier to press the bearings and seat them correctly. Another tip is not to overfill the compartment with grease - this creates a hydraulic lock which pushes the seal back out. I'm not sure how to know when you have the right amount.
Prior Posts/working notes.
Feb 4, 2024
Being a little unsure about the advisability of a similar-but-not identical bearing, I elected to order one profurl NC42 drum rebuild kit, part # P035016. C$180.99 at www.marineoutfitters.ca) This baffled then delighted me by including two bearings, (plus 2 seals, grease, and the necessary circlips) both to the "c2" tolerance. Apparently some models of furler contain only one bearing, some two, and unsurprisingly they chose to sell me two. So, I need only buy two seals and I can also rebuild the swivel, and will now have a good used bearing in reserve.
It had been awhile since I disassembled the furler and swivel. Unfortunately I didn't document disassembly, however the Circlips vary in thickness by location and the assembly is fairly intuitive if you puzzle it out.
A couple of hints:
- Document disassembly better than I did.
- heat the aluminum drum/swivel housings in a warm oven to expand a bit, and the new bearing will drop right in with a gentle push and tap.
- Make sure you have large circlip pliers, both opening and closing types. Don't try to do this job without.
- Fabricate an approprite press to install the new seals. I cut a 3" picee of plastic pipe that was somewhere around 55mm ID and used my bench vise as a press.
- Reassemble with lanolin or tefgel on all fasteners. I was spared any issues but others have struggled with siezed and stripped fasteners.
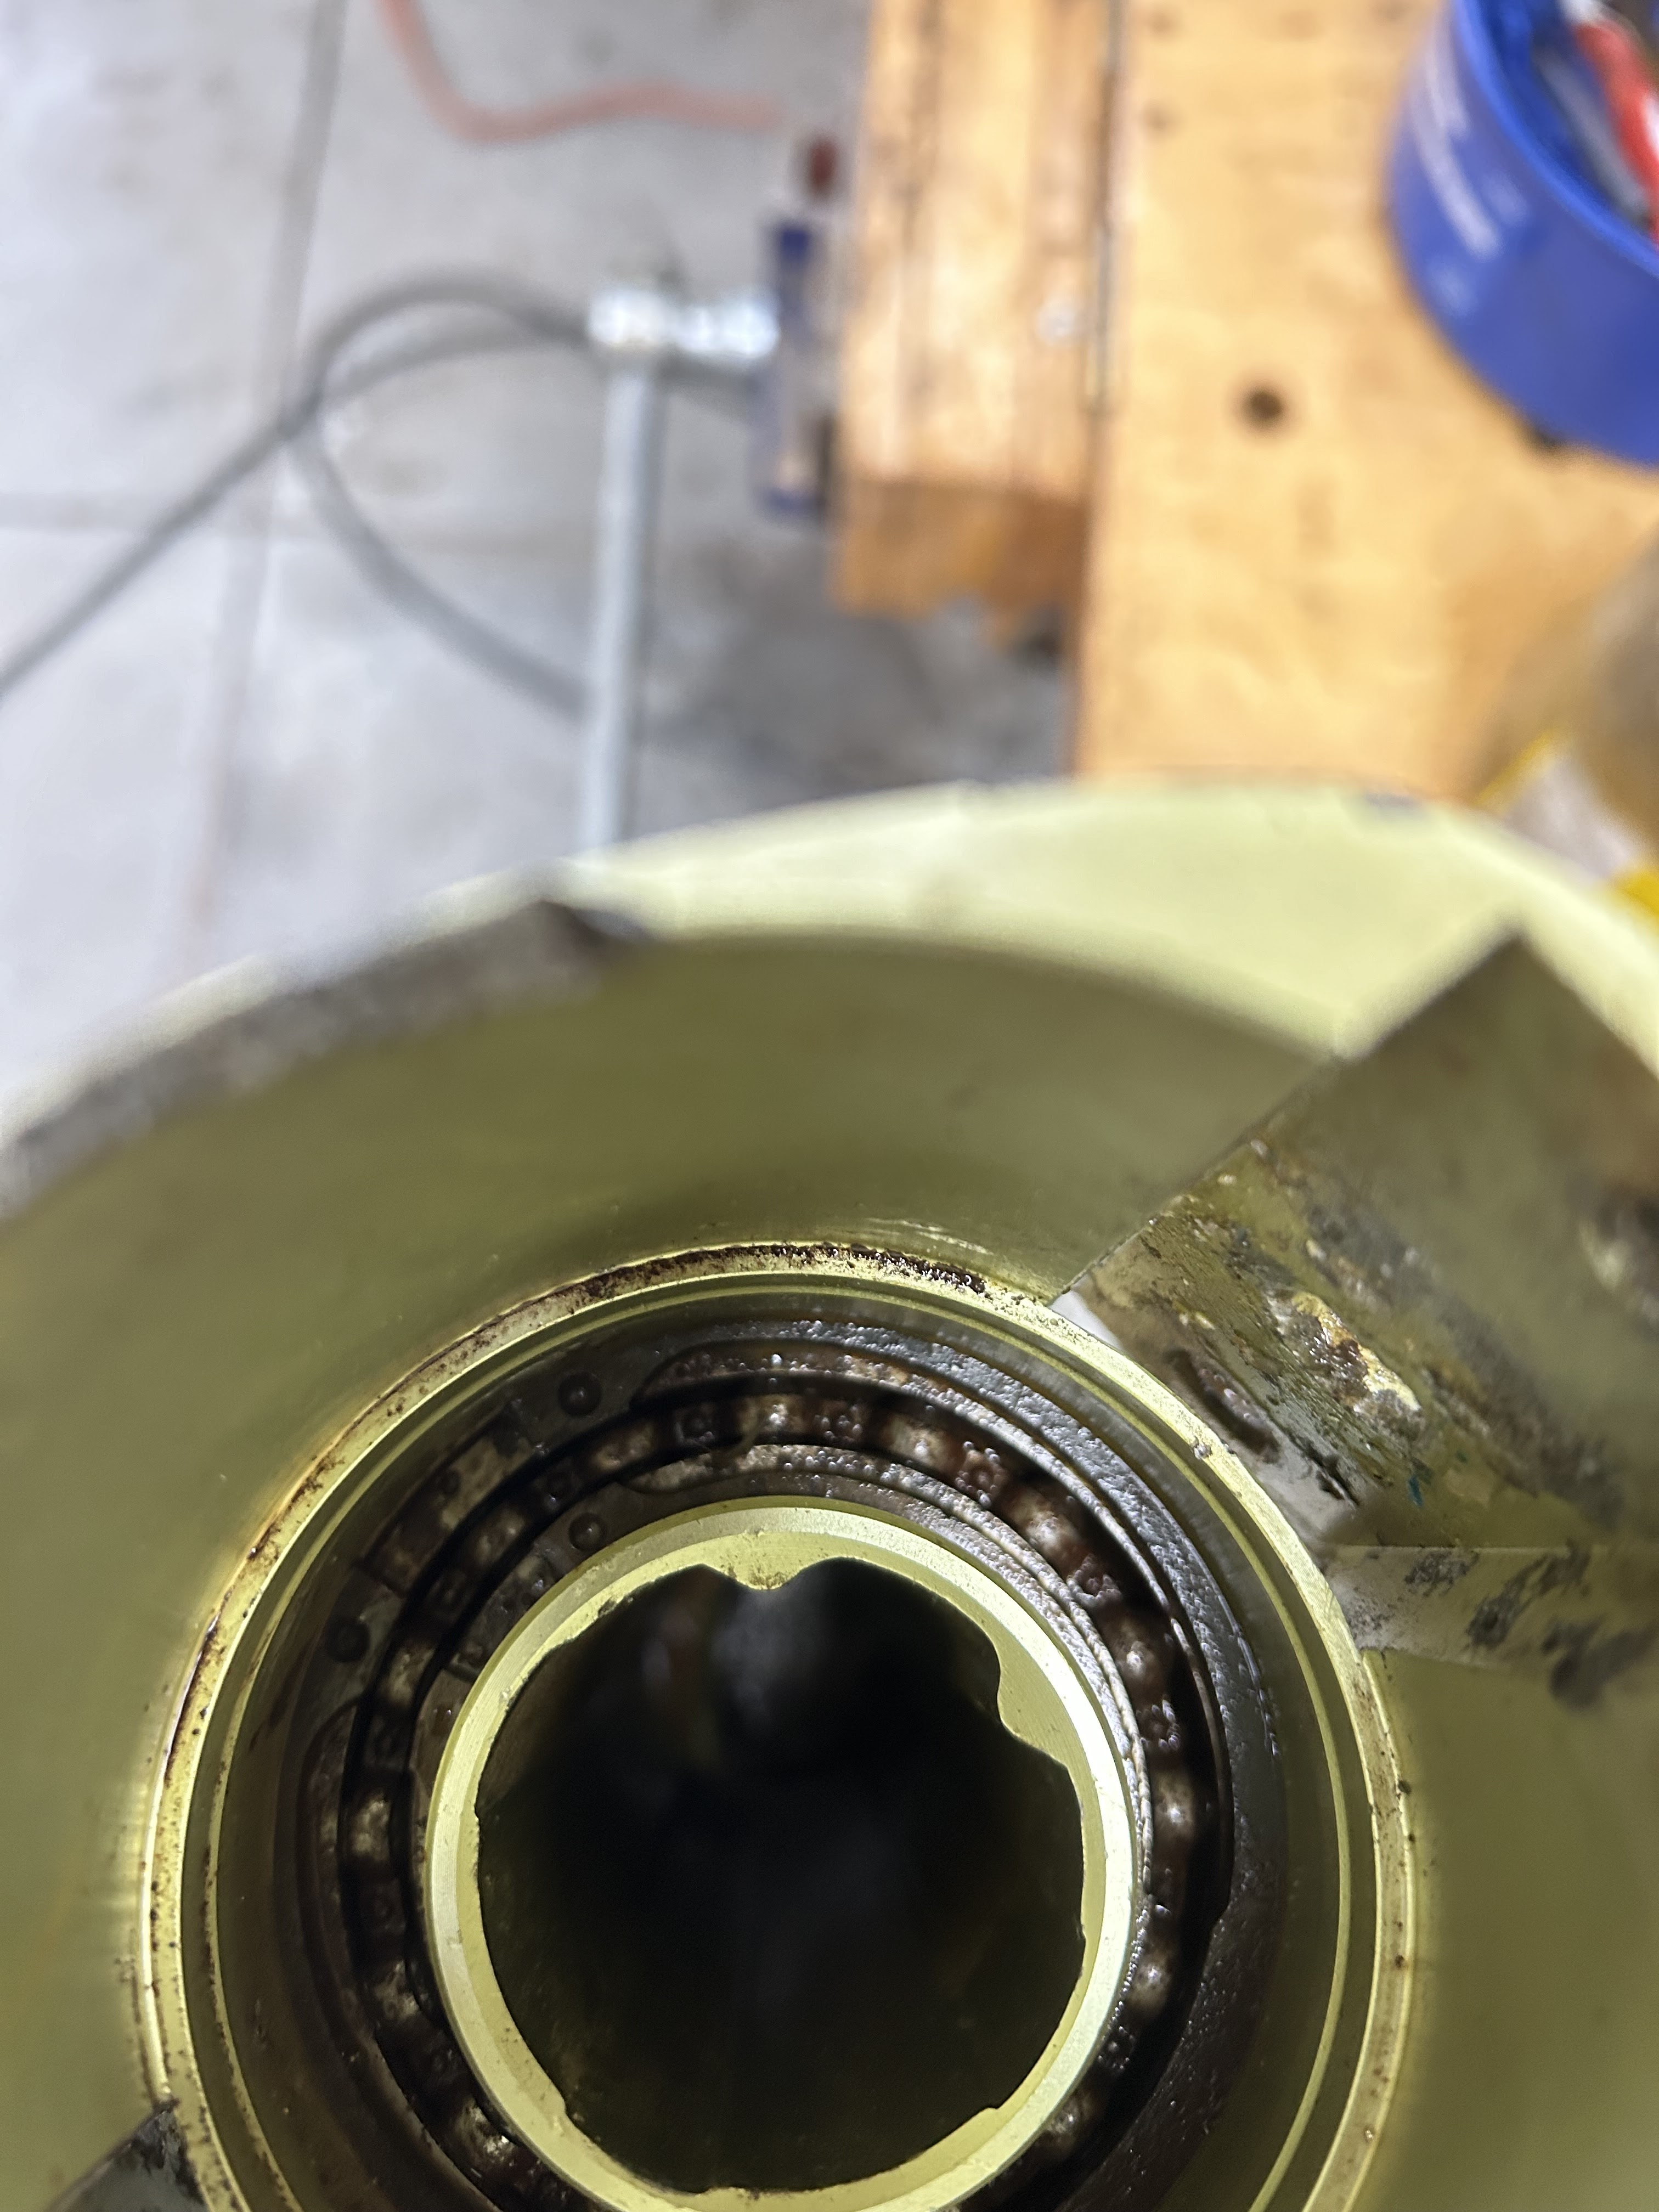
See below- new bearing settled in its clean, green, grease.
Drum ready to roll.

Genoa Furler Refurbishment, Profurl NC42 (2001)
The dissimilar metals used in the fasteners and other parts also create disassembly issues, with many owners online reporting stripped fasteners and other disassembly challenges. Fortuntely I was able to dissamble the unit with appropriate tools and some patience and care.
In a very rapid response to my inquiry, Pascale at Profurl identified my genoa furler as a model. NC42, produced in 2001. The base section housing is stamped 058048 and the swivel body 057898. The lip seals are stamped AS 50 80 10F and the bearing is marked 1 6010C2. The seals appear to be an off the shelf item, however the bearing's C2 suffix denotes closer-than-normal play between the inner and outer race. Many online replace this bearing with the standard model #6010.
The staysail furler is Model C350, 36mm extrusion.
Dear Dave,
I thank you for your message,
Your system is C350.
The beraring kit is
For the drum ;;Reference P269016
For the swivel : reference P269026
You can order from the nearest Profurl dealer, or online via :
https://www.international-
we thank you for your trust,
we remain at your disposal,
kind regards,
Bien Cordialement
Pascale Royer
Wichard Profurl


profurl rebuild notes
https://www.cruisersforum.com/forums/f55/profurl-overhaul-bearings-and-seals-149575.html
https://www.youtube.com/watch?v=v_pBLjgzGS0&t=38s
Seal
https://www.motioncanada.ca/products/sku/02335875?fromSisterSite=true
http://www.exfac.com/aussie_bray/profurl_bearings.htm
Disassembly


Circlip, spacer circlip


Bearing contained in the factory refit kit, serial numbers..